硬件
|
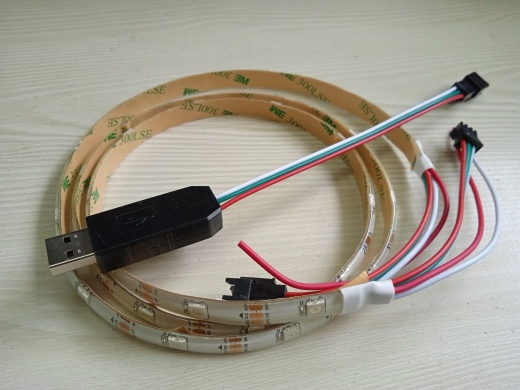
Shell Lab L2 是USB串口控制的可编程LED灯带控制器 产品特点: ● 支持WS2812灯源芯片,5V供电● 灯源数量可根据实际点数设置 ● 信号灯模式,整条灯带单一颜色处理,可设置颜色、闪烁频率,指令简单 ● 红绿蓝三色均可独立调节,范围0~255 ● 集成闪烁效果(频率可调,0.1~20Hz,设置为0时为静态不闪烁) ● 寻址模式,单个灯源芯片可指定颜色,指令较为复杂 ● 串口交互式控制,开放式通讯协议,自带命令帮助 ● 不限制编程语言(推荐Python) ● 提供配套上位机“测试台软件”,自带众多示例代码 ● 用pip安装mcush库(支持windows/linux/mac),编写python脚本 应用场景: ● 产品原型设计(用Python快速验证你的创意,收集用户反馈)● 产品、软件循环测试出现异常时报警提示(可配合Shell Lab测试台软件) ● 产品生产线项目测试结果提示,如绿色正常通过,红灯故障失败并报警 ● 实验进度状态提示 ● 看板系统状态提示 ● 物流仓储管理,货物定位提示 ● ROS机器人信息提示 ● 互动式游戏设计 ● 教学实验设计 ● 户外无人值守场景,自动信息提示 ● 工控设备系统集成 ● 艺术创作 ● DIY玩具 ● 广告招牌 工作模式: ● 信号灯模式(所有灯使用同一个颜色,指定颜色频率后自动渐变式闪烁)● 寻址模式(静态设置,每个灯芯可寻址改颜色) 支持定制: ● 定制PCB和外壳,适应不同场景● 定制固件,实现特定场景下的工作模式,适合作为独立的灯光模块系统集成 ● 改用蓝牙转串口模块,方便手机无线控制 ● RS232接口的控制器 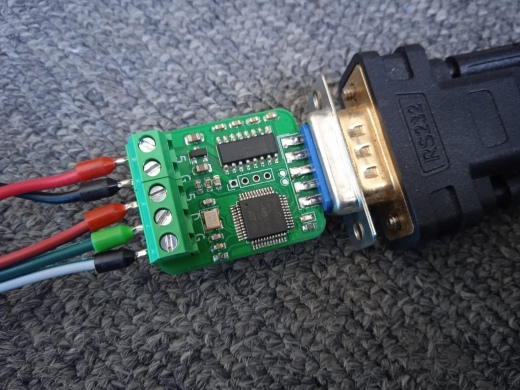 ● 多路并行灯带控制器 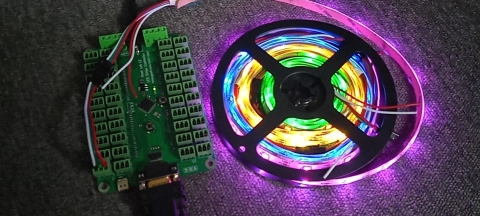 ● 定制的户外LED灯(含16个串联灯芯) 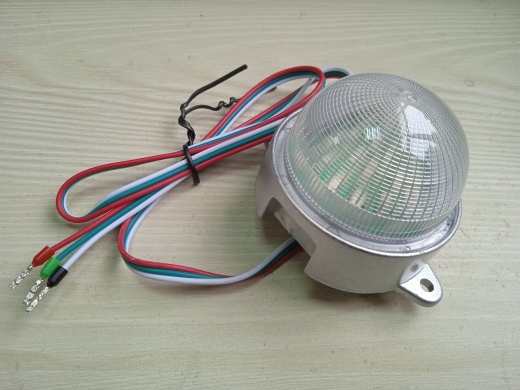 注意事项: ● 信号灯模式下的工作原理控制方式与Shell Lab L1信号灯基本一致,可方便替换● USB供电能力有限,若灯带长度过长功耗过大,请自行增加外部5V供电(建议在灯带末端加电) |
软件
|
串口通讯常见问题 C语言编程常见问题 串口指令: 1、信号灯模式控制示例: 上电复位后先指定灯带长度,输入命令:(常用的基本色): 黑色: 0x000000 红色: 0xFF0000 绿色: 0x00FF00 蓝色: 0x0000FF 黄色: 0xFFFF00 青色: 0x00FFFF 紫色: 0xFF00FF 白色: 0xFFFFFF 红灯闪烁(默认1Hz): 示例(标准模式): 使用前必须先关闭信号灯模式(两者会冲突),设置长度为零即可,然后指定长度初始化:(注:由于芯片内存容量的限制,能控制的点数为300) 将后半段灯带向前移动一位,#0号灯用绿色填充,一起刷新: 后续可以直接加载文件,快速应用,适合加载预存的样式、图片等。 示例(分组模式): 将多个连续的灯合并成组,每组共享同一个内存颜色,同样的内存可以控制更多的灯,但是刷新灯带需要更多的时间。30个灯每3个一组共10组,初始化: 示例(可变分组长度): 实际应用中,由于装配的原因,各个分组长度不同才会有更好的展示效果。这时需要用文件定义实际分组长度,用脚本工具写入控制器的文件系统。 如已经写入文件/c/glist,内容为二进制0x03,0x05,0x0A...,对应相应分组的长度,然后初始化: Python封装: 安装:pip3 install mcush升级:pip3 install -U mcush 示例: 下载 |
应用
信号灯模式闪烁效果
多重颜色闪烁效果
长灯带
推送指令
推送指令(快速)
推送指令(32*8=256灯,彩虹流水灯)
配置成上电RGBCMY颜色循环 下载
用上述代码定制爱心形状盒子的变色灯
配置成警灯下载
运行效果
用C-API编译流水灯
运行效果
配置成命令启动的流水灯下载
运行效果
配置成上电循环显示两幅图片(8x8) 下载
上述代码效果
定制户外LED灯的效果
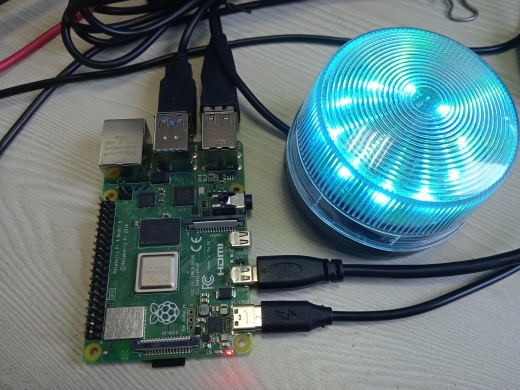
连接树莓派控制
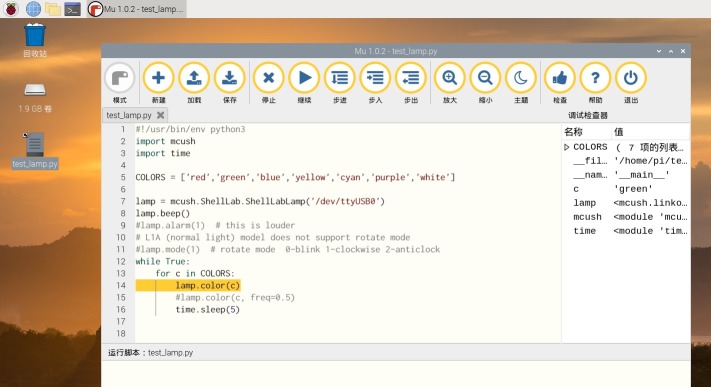
连接树莓派单步调试
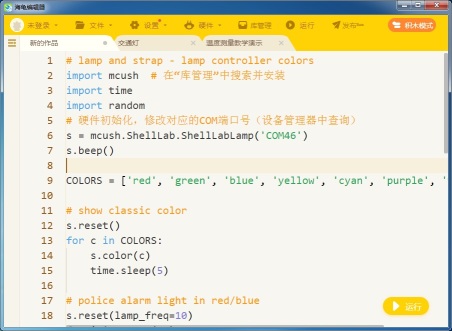
连接海龟编辑器控制
ROS系统中,触碰边缘后变色警告
使用mcush_util工具测试
多重颜色闪烁效果
长灯带
推送指令
推送指令(快速)
推送指令(32*8=256灯,彩虹流水灯)
配置成上电RGBCMY颜色循环 下载
|
配置成警灯下载
|
用C-API编译流水灯
|
配置成命令启动的流水灯下载
|
配置成上电循环显示两幅图片(8x8) 下载
|
定制户外LED灯的效果
连接树莓派控制
连接树莓派单步调试
连接海龟编辑器控制
ROS系统中,触碰边缘后变色警告
使用mcush_util工具测试
|